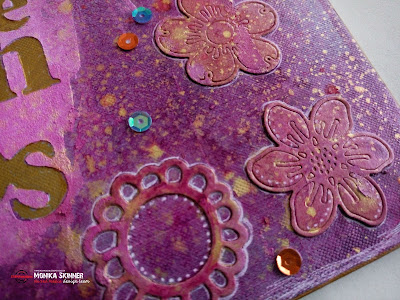
Hello Crafty Friends! It's Monika here today inviting you to some playtime. I acquired some old ring binders for free the other day and thought I'd get messy with one of them.
In today's tutorial I share the messy outer cover for what will eventually be the new storage for my ARTplorations stencils. The old box they are in is bursting at the seams.
To start with, I gathered some supplies.
Daisy Play, Droplets, Prisms and Forest Of Leaves stencils
Where Troubles Melt mask
Trendy Spring Blooms dies
I also picked up various other bits such as Caribbean, Lavender and Pink acrylic mousse, acrylic medium, various spritzing inks, distress Oxides, gesso and pens for doodling.
The original black folder was given a couple of messy coats of gesso.
With the mask in place, I spritzed and brushed with Mallow Misting ink.
Next I added some Clover Misting ink to lay down some base colour.

I added some pink mousse through the Daisy Play stencil, some Caribbean mousse through the Forest Of Leaves stencil and some Worn Lipstick Distress Oxide through the Prisms stencil.
Next I added the ARTplorations Stencils logo and die cut flowers using acrylic medium and spritzed again with both Misting Inks.
I added the Lavender mousse around my mask, removed the mask and allowed the mousse to set.
I placed the mask over the words and spritzed with Pink, Mallow Clover and Gold before removing the mask again.
Next I used my gold alcohol marker to fill in the lettering.
I added some Droplets using Wilted Violet and Worn Lipstick Distress Oxides and added a white outline to some of them, spritzed with a little more gold, added some white doodles and edged the cover using my gold alcohol marker.
I then added some sequins to finish. The cover will take a while now to dry properly before I can fully finish with a protective coat of Mod Podge and start on the inside of course.


wonderful!
ReplyDeleteGorgeous work. Thanks for the ideas :)
ReplyDeleteYou look like you had so much fun creating this colourful ring binder. Lots of layering and lots to look at. Looking forward to part 2 x
ReplyDeleteThat is such a great idea! I have many ring binders for storage so I might just give this a go :)
ReplyDeleteFabulous! Looking forward to seeing the inside too! xxx
ReplyDelete